Sew What’s Up Presents
The Sew What’s New Archive
This archived content is from Mary Wilkins’ sewing and
quilting message board “Sew What’s New,” which was
retired in August 2007. It is being provided by
“Sew What’s Up,”
which serves as the new home for many members of “Sew What’s New.”
From: blackie
Date: 07-02-2007, 03:36 PM (1 of 8)
|
I was asked to post progress. May I say I am finding this the most fun project ever? Perhaps it was inspired by reading FFRP where they suggest sewing the basic dress pattern and say, "this is the most fitted item you will sew". I'm like... no... I'll sew a *corset*! (I realize that corsets don't require sleeve nor back alterations that FFRP discusses). OK, so here is my daily blog entry from yesterday. You can follow my corset on my sewblog (http://kelly.hogaboom.org/tutorials/labels/corsetry.html). I am making... drumroll... wait for it, wait for it ... A corset! I know. Dumb, huh? I mean here I have six months of sewing for the family ahead of me, so I'm going to spend time and money making a corset. Well I just bleeping am . My corset is #100 (View A or Dore) from Laughing Moon Mercantile . There are many reasons I chose this pattern from this company, and as I've worked on this project I'm increasingly glad I made this choice (email me if you want to know why). Yesterday I embarked upon this journey which ultimately meant tracing, cutting, and marking 45 pieces of fabric! No, but really - it was fun. So here we go. 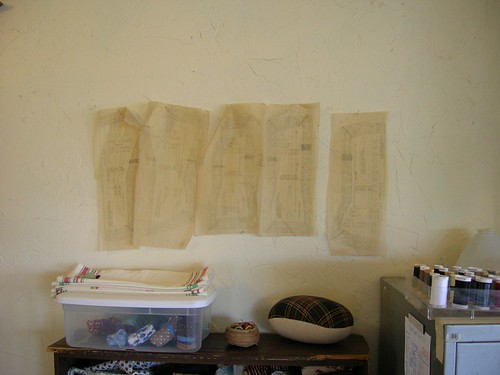 These are the pattern pieces for the Dore view. This Victorian corset is really two halves - when worn, the front is held together by a busk and the back, by laces. Here you see the pieces for one half, laid out from center front to center back, left to right. Notice the many cutting lines. Yikes! To avoid cutting the pattern (or even marking my cutting lines in red pencil), I taped each piece to the window, laid my tracing paper over, and traced, grading for size (my bust, waist, and hips correspond to different pattern sizes). 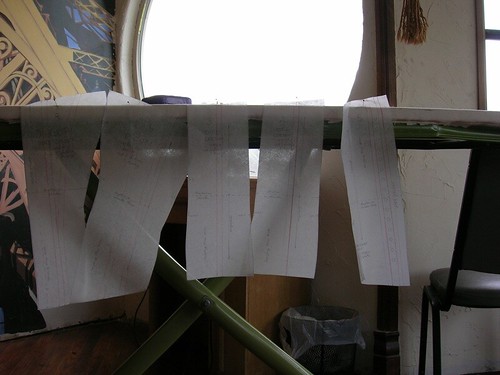 Traced and ready to go! Again, laid out front to back. The red markings are the boning channels. Boning is sewn together towards the end of the process when your layers are basted together. Boning channel lines will be transferred to the lining only. 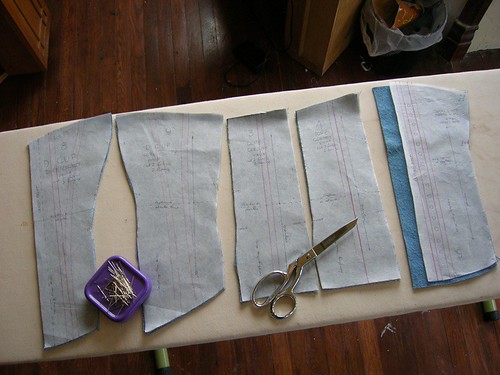 Making a muslin (not to be confused with the word "muslim", which I do all the time). A muslin (also called a wadding or toile) is a test garment made of similar fabric without unnecessary features, used to evaluate fit. It sounds like a complete waste of time, eh? But for something like a corset, making a muslin ensures you will not be crying tears of rage when your lovely finished, three layer, hand-hammered and boned corset rolls down in the bust or laces shut in the back. The Laughing Moon DVD on Victorian corsets gives a great demonstration of fit for this corset; it's not as hard as you think. Oh, and if you have a sharp eye you will notice the far-right piece - the center back - is upside down. My muslin turned out well. I decided to trim 1/2" off the center back at top (before grommets were applied) and 1/2" off the center front at waist. No further alterations were necessary. I marked these changes of 1/2" on my pattern and made notes. I was then free to cut the fabric for the actual garment. I will keep my muslin to evaluate fit if I make another corset (weight gain or loss would effect future garments' fit).  My fabrics. I am drooling. The corset pattern is two-layered. Since I wanted a pretty fabric on the public side, I sewed an overlay (the pink and olive cotton) to the outer layer or shell; I will then treat these pieces as one. So in this photo on top we have the lining fabric, or what will face my body. In the middle we see the overlay, which has been stitched to the shell (or strength) corset fabric. The bottom piece we see what the shell is made of - a natural cotton duck ( quack! ). 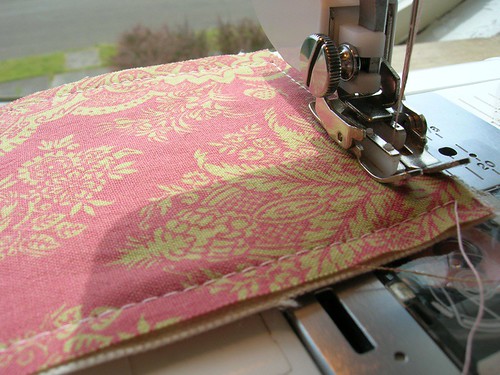 Stitching the overlay to the shell. It can be harder than it looks; here I'm making it easier by using a walking foot.  A word of caution. Corset pattern pieces can be either rectangular, hourglass, or spoon-shaped and it's not always easy to tell which way is up. Can you tell? Here's a hint:  This is the center-back piece - the narrower edge is the top of the corset. While taking off my 1/2" at the top of the back I accidentally started cutting into the top - you can see the divet off the bottom of the pieces (there are two identical divets because I layer pattern pieces to cut them). 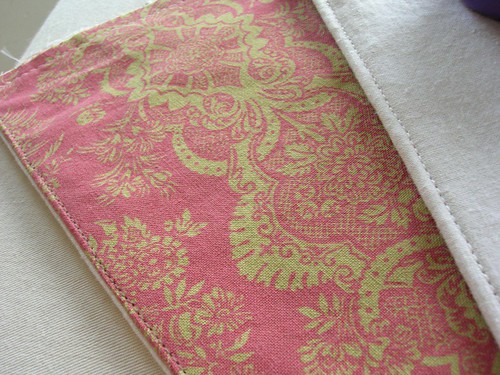 I just had to get to a final seam! This is one of the first things you do after you have all your pieces cut - you join the lining to the shell in the center back. Here you see the two center-back facings, public (left) and lining-side (right). I am using brown-gold thread in the top, natural white in the bobbin case. 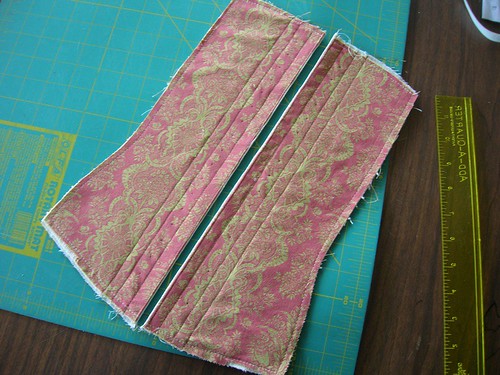 45 pieces and many stitches later, we see the center back with two boning channels per side and grommet markings. So tomorrow I will be whacking 34 grommets in place. An exacting seamstress will note you can see a strip of the white lining on the center back facings. Well, I like the effect. Also as well I did not follow instruction which made this pressing hard. After sewing I trimmed down my seam allowances to 1/4" before pressing, instead of pressing first. My 1/4" of strong cotton duck did not want to lie flat; and frankly, I didn't feel like trying that hard. However, it was a good reminder to follow directions; after all, I think Laughing Moon knows what they're doing more than I do! Speaking of next time, tune in as I whack grommets and sit by the mailbox grasping my hands and awaiting my busk! see the mundane life of a housewife.
|
User: blackie
Member since: 03-31-2004 Total posts: 594 |
From: mommydionne
Date: 07-02-2007, 04:12 PM (2 of 8)
|
very interesting project, you are good at taking pix as you go along !! keep us updated
Jeanette
|
User: mommydionne
Member since: 01-08-2004 Total posts: 838 
|
From: MartySews2
Date: 07-02-2007, 08:03 PM (3 of 8)
|
Great job on an interesting project. Now, where do you plan to wear this corset or is that a secret? Happy Stitching! Marty 
|
User: MartySews2
Member since: 05-03-2007 Total posts: 293 |
From: blackie
Date: 07-02-2007, 08:12 PM (4 of 8)
|
Ha ha, it's for a Halloween costume BUT! I also just wanted to make one! Who knows, if I succeed I may make one to actually wear for a support garment. Or I can make one for a friend. I know lots of gals who would love one. Today I put the grommets in; I will post pictures as I go, for sure. see the mundane life of a housewife.
|
User: blackie
Member since: 03-31-2004 Total posts: 594 |
From: Magot
Date: 07-03-2007, 11:19 AM (5 of 8)
|
Thanks Kelly - youseem to have gone a long way in only one session! Sheesh! A one-woman sewing diva!
love and kisses, Jan
Guts-R-Us Cells a Speciality DNA to order. |
User: Magot
Member since: 12-22-2002 Total posts: 3626 
|
From: AndreaSews
Date: 07-03-2007, 12:03 PM (6 of 8)
|
looks great so far. have fun with the grommets. In the fall, I saw some sitcom characters wearing an underbust corset over a blouse paired with jeans.
Andrea
|
User: AndreaSews
Member since: 02-18-2005 Total posts: 1007 
|
From: MaryW
Date: 07-06-2007, 09:42 AM (7 of 8)
|
I love your project. Pictures are perfect and description is excellent. Halloween! Here I thought maybe you and hubby were off on a weekend romp. The fact that you just wanted to make it intrigues me as well. I thought I was the only one who made things just becuz I wanted the experience. Many times I have seen things I wanted to make but I know I will never wear them. Good work Blackie, keep us posted. The fabric is very pretty too. MaryW
owner/editor of Sew Whats New |
User: MaryW
Member since: 06-23-2005 Total posts: 2542 
|
From: grandma C
Date: 07-07-2007, 01:14 AM (8 of 8)
|
Thanks for the step by step rendition. I think I would get good experience from that project. You have inspired me. Belinda |
User: grandma C
Member since: 01-15-2007 Total posts: 263 |
Visit Sew What’s Up for the latest sewing and quilting tips and discussions.
This page was originally located on Sew What’s New (www.sew-whats-new.com) at http://www.sew-whats-new.com/vb/archive/index.php/t-22782.html
Sew What’s Up is hosted by ZenSoft